The Active Directory PowerShell module is part of the Remote Server Administration Tools (RSAT) in all Windows Operating Systems. It is a set of PowerShell cmdlets that imparts flexibility in managing Active Directory.
While AD management is possible using the native GUI-based tools like Active Directory Users and Computers console, installing the Windows Active Directory PowerShell Module gives you the ability to make changes in bulk. This is because PowerShell commands can iterate changes through object lists at a far greater rate than through the graphical interface.
A full list of Active Directory PowerShell cmdlets is available on the Microsoft site.
In this tutorial, we will see how to install and import the AD PowerShell module. Installing it makes the tool available on your workstation or server, while importing the PowerShell module for AD loads it to the instance of PowerShell that is running.
Installing the Active Directory PowerShell module on member servers
The Active Directory PowerShell module is available by default on all domain controllers. It is also available for installation on member servers running Windows Server 2008 and higher.
Method 1: Installation via Add Roles and Features
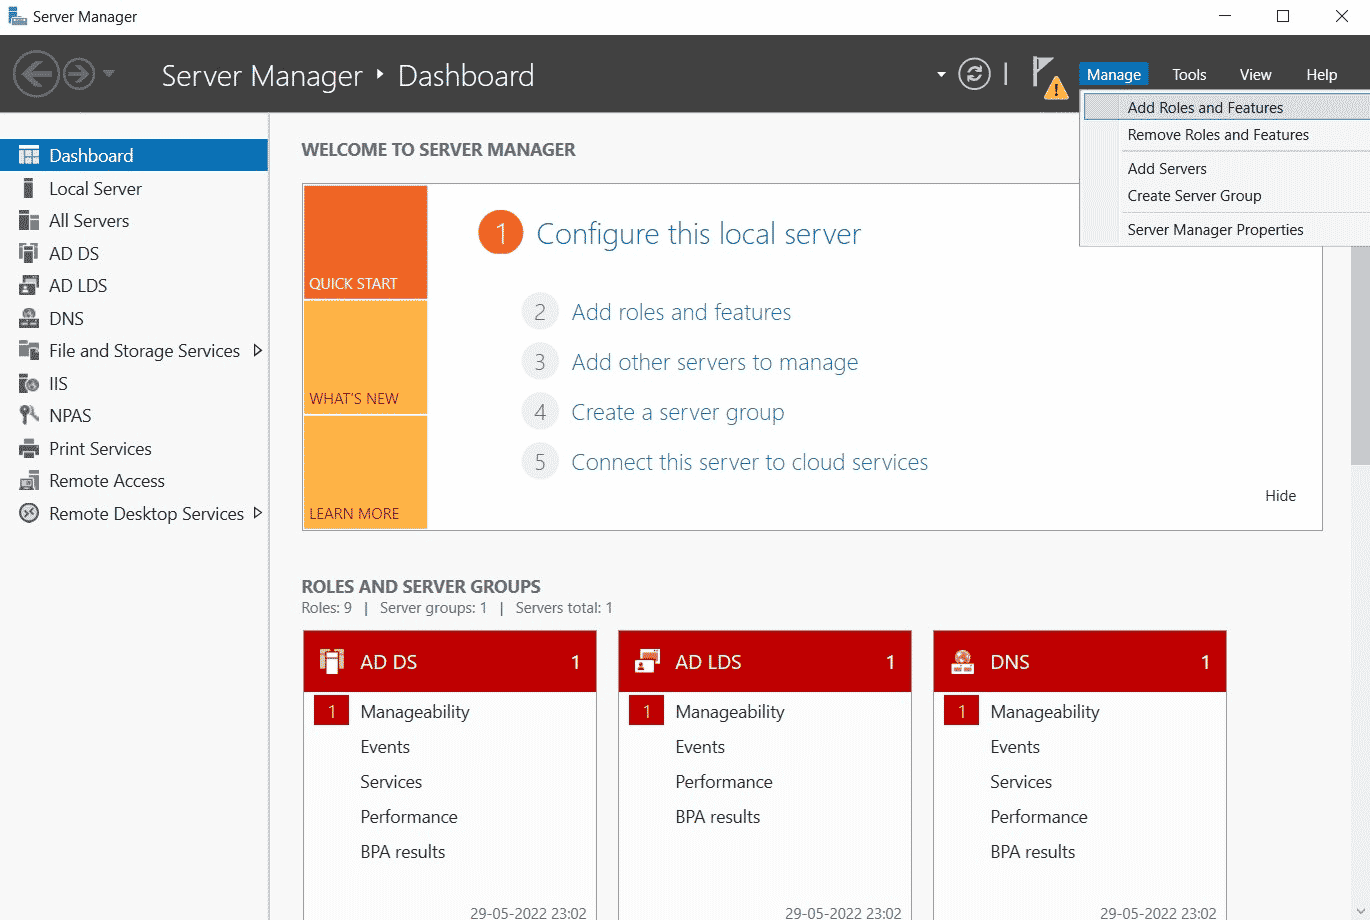
1. Open Server Manager.
2. Click on Manage -> Add Roles and Features.
3. Select Role Based Installation and click Next.
4. Select the server you want the Active Directory PowerShell module on. Click Next.
5. On the Features Page, expand Remote Server Administration Tools -> Role Administration Tools -> AD DS and AD LDS Tools, then select Active Directory module for Windows PowerShell. Once selected, click Next.
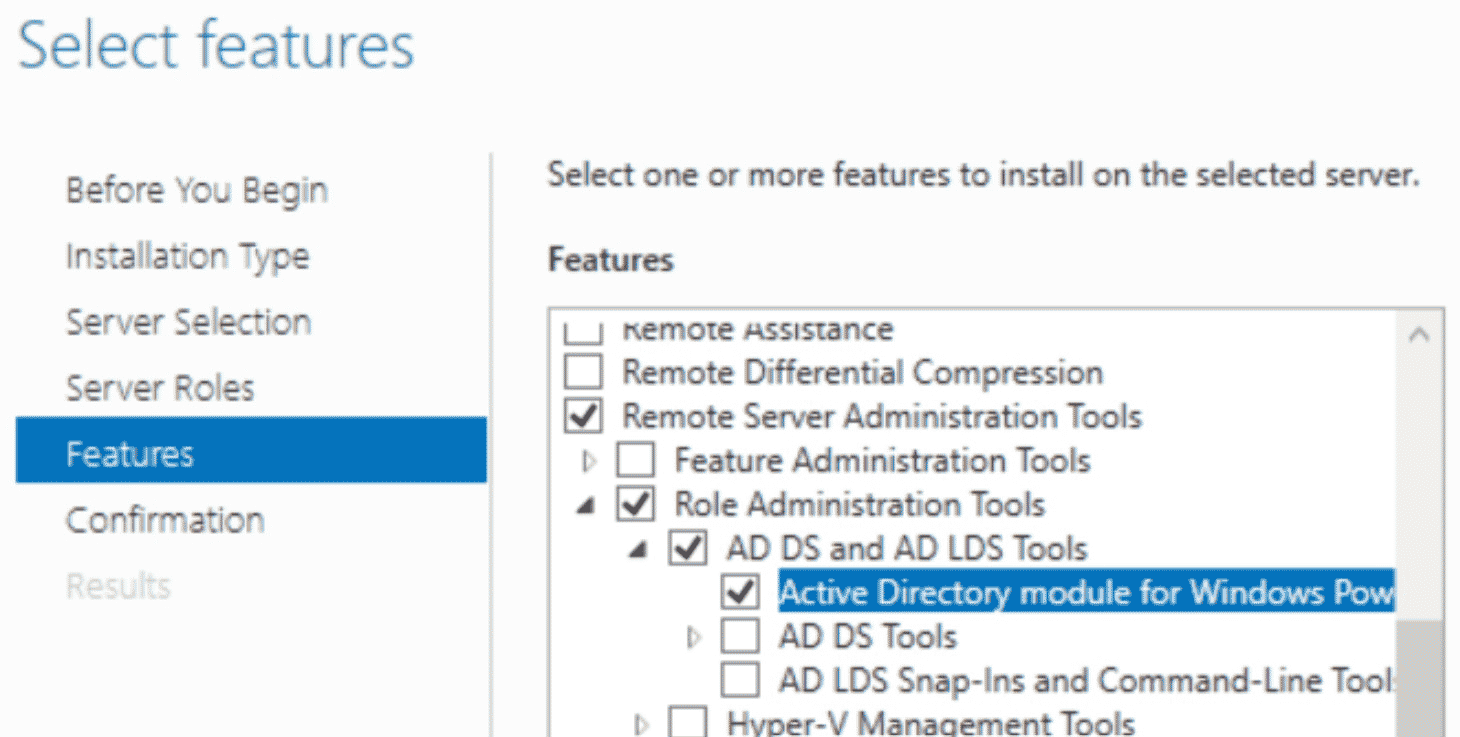
6. On the confirmation page, click Install.
Method 2: Installation via PowerShell
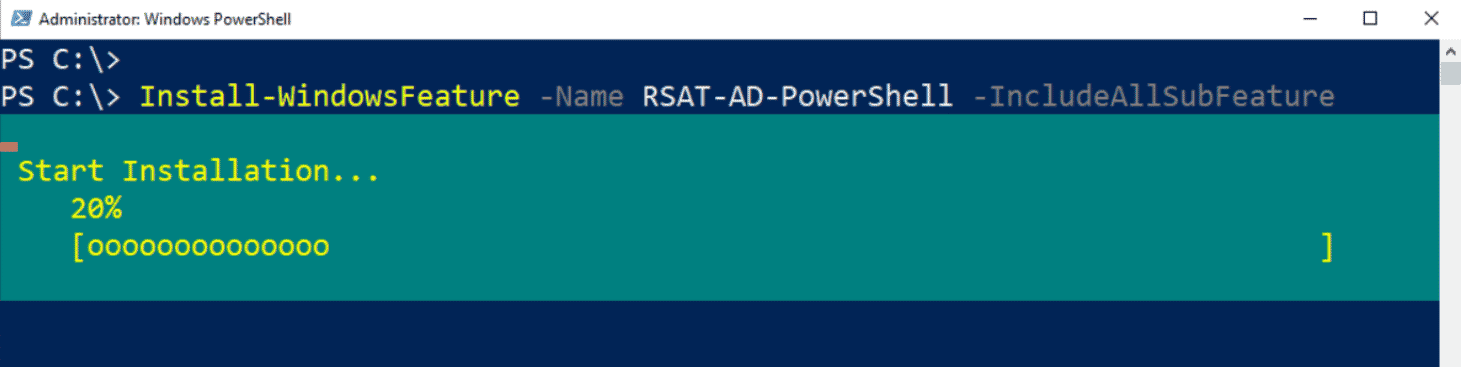
1. Open Windows PowerShell from the Start menu.
2. In the PowerShell console, use the Install-WindowsFeature cmdlet to install the Active Directory PowerShell module. Specify the feature -Name (RSAT-AD-PowerShell) and add the -IncludeAllSubFeature parameter to add any child features.
Install-WindowsFeature -Name “RSAT-AD-PowerShell” -IncludeAllSubFeature
Installing the Active Directory PowerShell module on workstations
1. Windows 10 (version 1809 and higher)
To install the Active Directory PowerShell module on Windows 10 (versions 1809 and higher) workstations, you need to enable the RSAT tools feature using the Apps & Features setting in Windows.
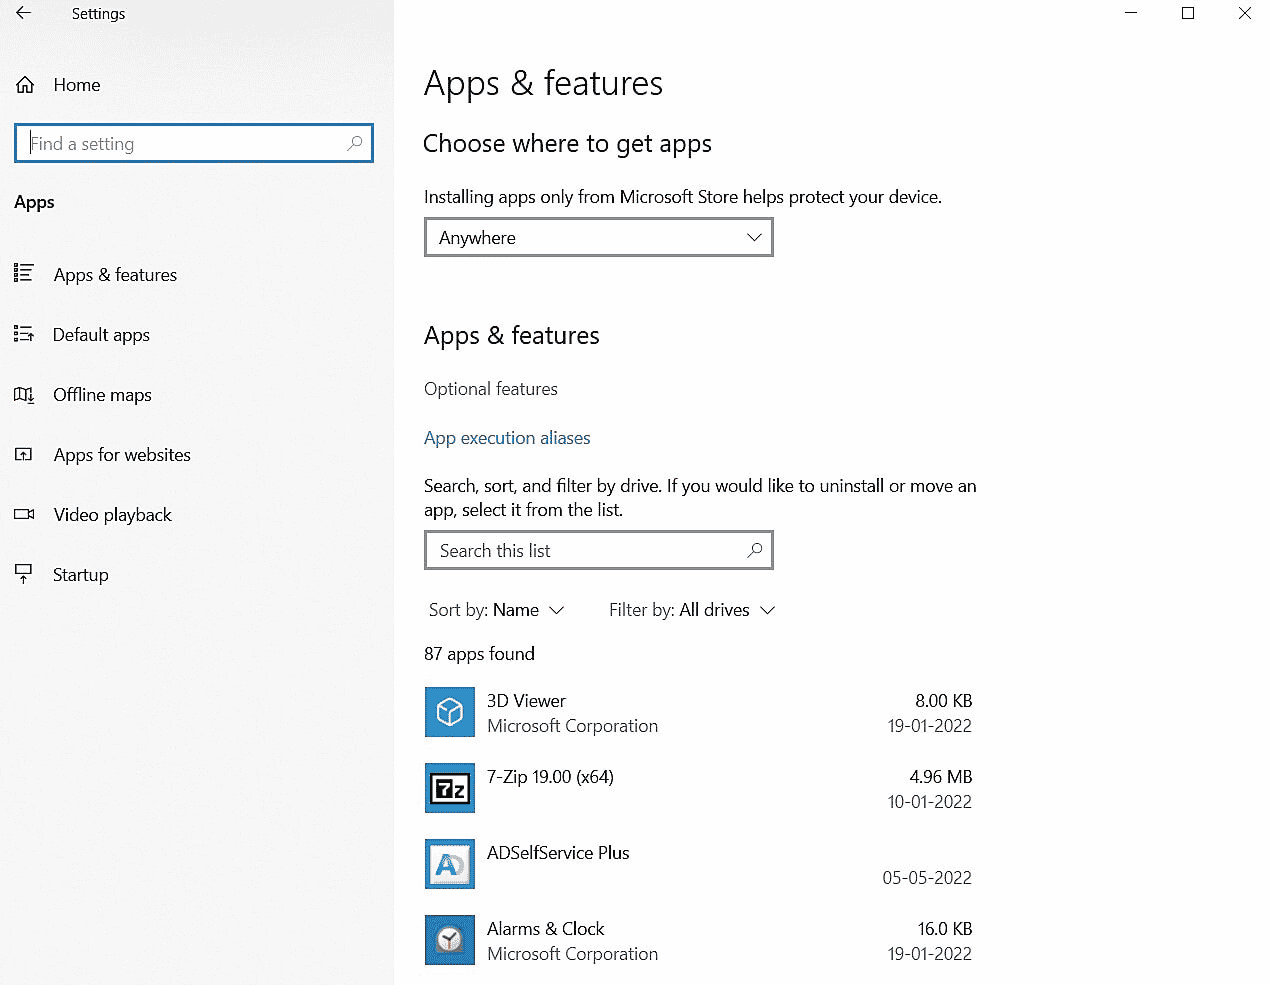
1. Click Start -> Settings -> Apps.
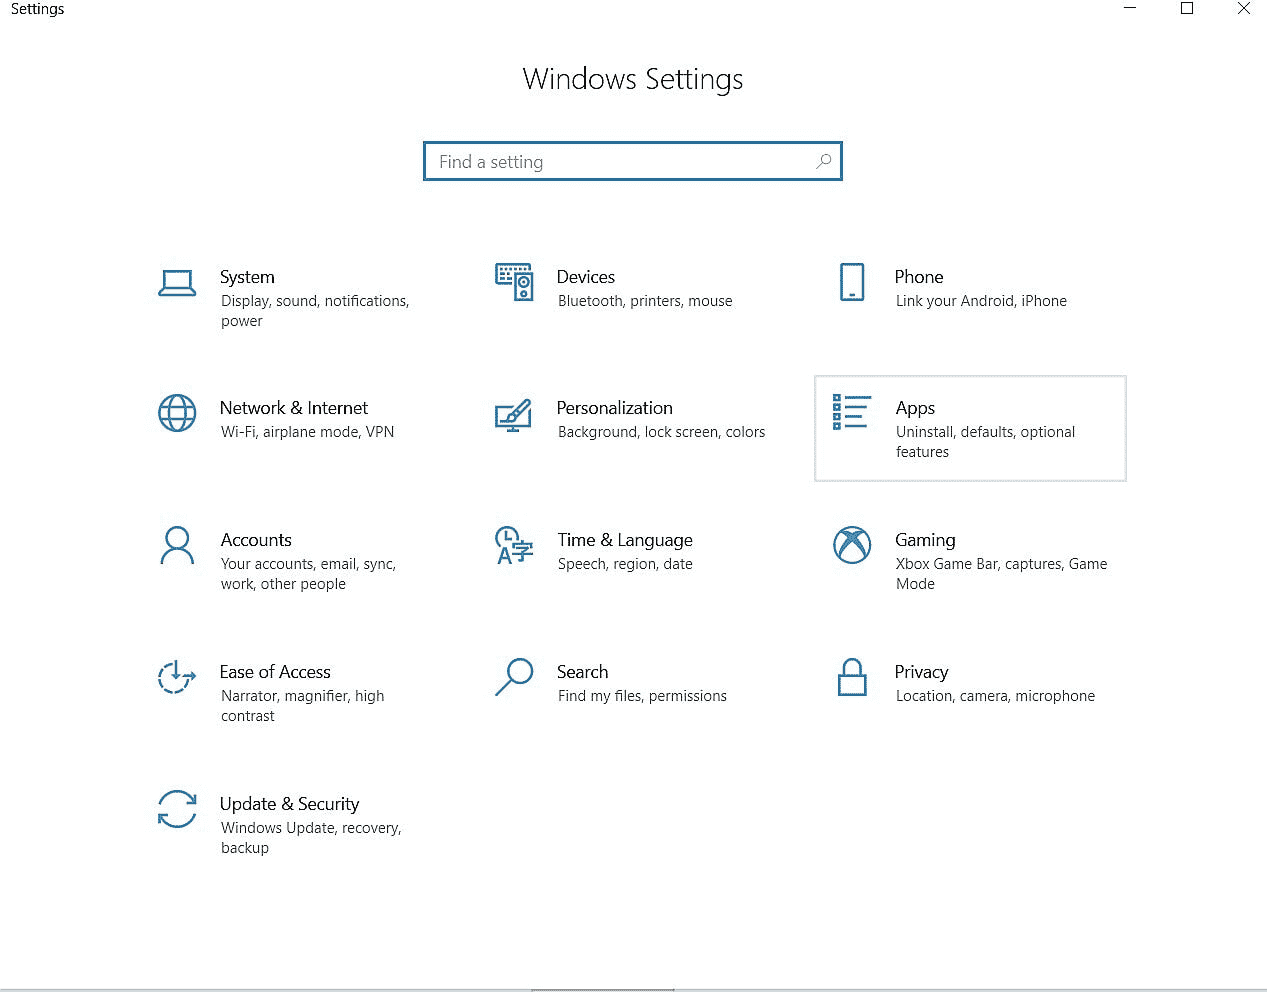
2. In the Apps & Features window, click Optional Features.
3. Click on Add a Feature and select RSAT: Active Directory Domain Services and Lightweight Directory Services Tools from the options.
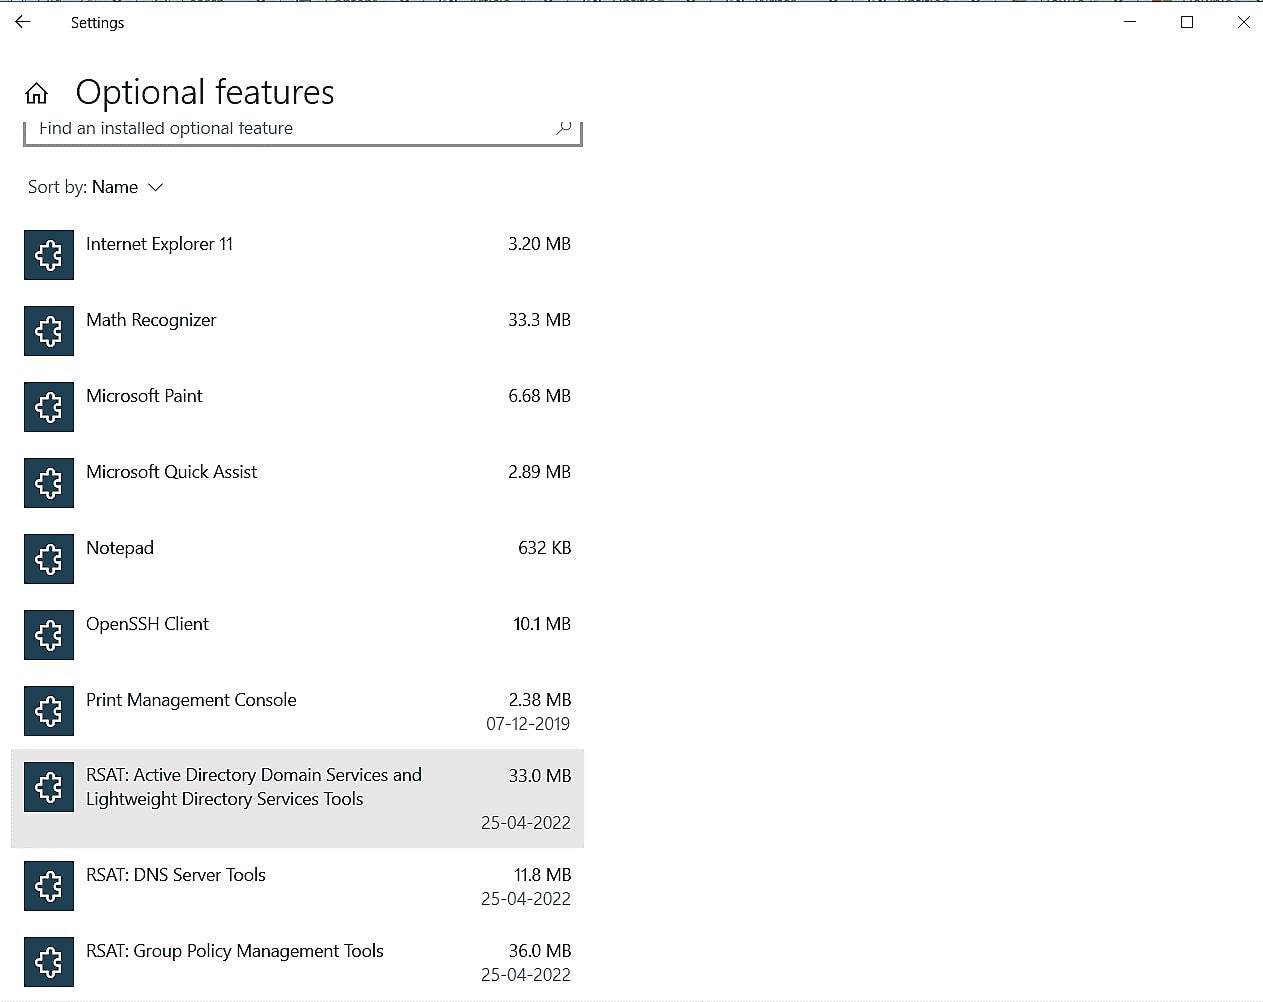
4. Select Install.
2. Windows 10 (before version 1809), Windows 8.1 and Windows 8
RSAT tools need to be downloaded from the Microsoft site (links below) and installed on domain workstations running Windows operating systems 10, 8.1 or 8.
The download and install process is straightforward. RSAT tools including the PowerShell Active Directory module will be available once the installation is done and the system is restarted.
Windows PowerShell Module for Windows 10
Windows PowerShell Module for Windows 8.1
Windows PowerShell Module for Windows 8
3. Windows 7
Windows 7 has been deprecated by Microsoft since January 2020. RSAT tools are hence unavailable for workstations running Windows 7.
Installation using PowerShell
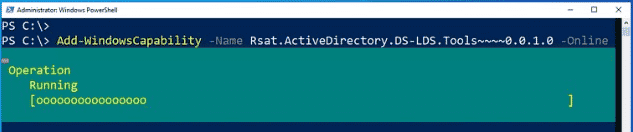
In the Windows PowerShell console, use the Add-WindowsCapability cmdlet to install the Active Directory RSAT tools. Specify the -Name (Rsat.ActiveDirectory.DS-LDS.Tools~~~~0.0.1.0) and the -Online parameter to use Windows Update to install the feature.
Add-WindowsCapability -Name Rsat.ActiveDirectory.DS-LDS.Tools~~~~0.0.1.0 -Online
Importing the PowerShell Active Directory module
There are multiple ways to install RSAT and AD PowerShell, but only one way to import it.
1. Open Windows PowerShell from the Start menu.
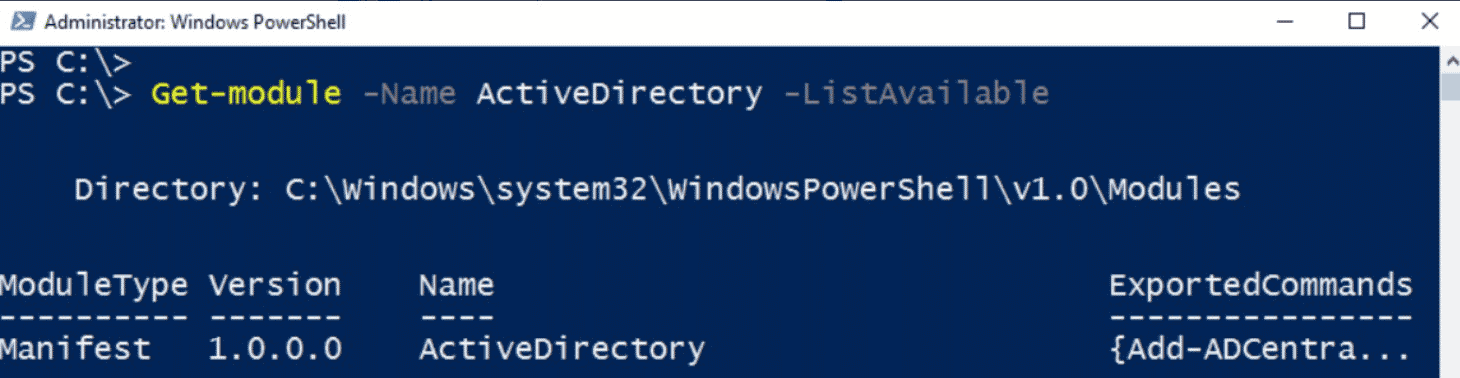
2. Verify that the AD PowerShell module has been installed by using the Get-Module command specifying the -Name (ActiveDirectory) and the -ListAvailable parameter to search all modules installed on the system.
Get-Module -Name ActiveDirectory -ListAvailable
3. Import the module using the Import-Module cmdlet, specifying the module’s name (ActiveDirectory) using the -Name parameter.
Import-Module -Name ActiveDirectory
That’s it! You have now installed and imported the Windows Active Directory PowerShell module.


