
How to map network drives with Group Policy
In earlier days, system administrators relied only on logon scripts to map networking drives, a complex and time-consuming process. To eradicate these hindrances, sysadmins rely on Group Policy to map network drives. In this article, we’ll learn why Group Policy is preferred and how you can map networking drives with GPO.
Why use Group Policy drive mapping
Using Group Policy to map network drives helps you to:
- Avoid the hassle of scripting
- Save time and effort by running scripts in the background
- Accelerate the login process without having to reboot or restart the system
- Improve scalability as it is robustly integrated with Active Directory
Enhance pliability while managing drive by using item-level targeting to apply preference settings to either group or individual user and computer
Steps to map a network drive using Group Policy on Windows Server 2012 R2
1. Open Group Policy Management in Active Directory
- Open Server Manager > Tools > Group Policy Management.
or
- Open Run command window > Type gpmc.msc > click Ok.
2. Create a new GPO to map the drive
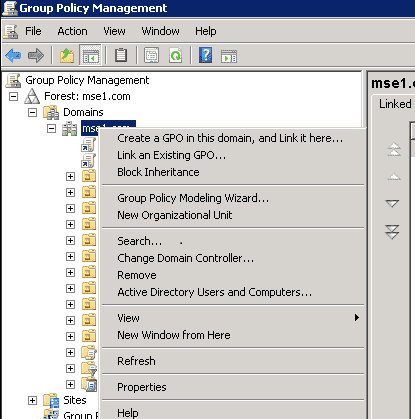
- Right-click on the OU in which you have created the user account, then click Create a GPO in this domain and link it here…
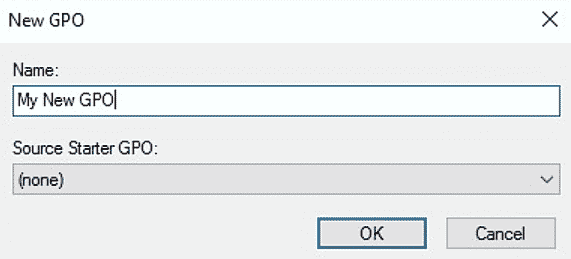
- In the New GPO window, enter a new name to identify the policy.


3. Modify the GPO settings
- Right-click on the newly created GPO and choose Edit.
- Click User configuration > Preferences > window settings > Right click on Drive Maps > New > Mapped Drives.
4. Configure drive properties
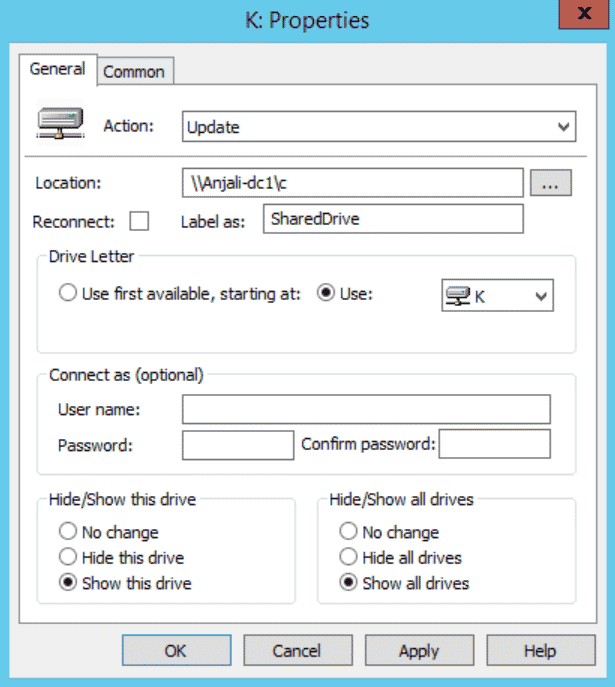
In the General tab, configure the settings below:
- Choose one of the following options from the Action dropdown list box
- Create: To create new mapped drive for the users.
- Replace: To replace the existing mapped drive and if there is no drive in existence, it will create a new mapped drive.
- Update: To modify the existing mapped drive’s configuration; if not, it creates a new mapped drive.
- Delete: To delete a particular mapped drive for the user.
- Location: Enter the path to the drive to be mapped.
- Reconnect: Enable this check box to reconnect automatically irrespective of policy removal.
- Drive letter: Assign a letter for the drive.
- Label as: Assign a suitable name for the drive (e.g., SharedDrive).
- Connect as: Use either current user account credentials or credentials of different accounts.
- Hide/Show this drive: Choose whether you want to hide or show the mapped drive in windows explorer.
- Hide/Show all drives: Choose whether you want to hide or show all the drives (mapped and physical) in windows explorer.
- Click Apply and then, Ok to save the settings.
In the Common tab, configure these additional settings:
- Choose Item-level targeting, and click Targeting.
- In the Targeting Editor window, click New Item.
- Choose Security Group among the items listed.
- Click … and enter the name of the security group.
- Click Ok to close the Targeting Editor window.
- Click Apply and then Ok to close the Drive properties.

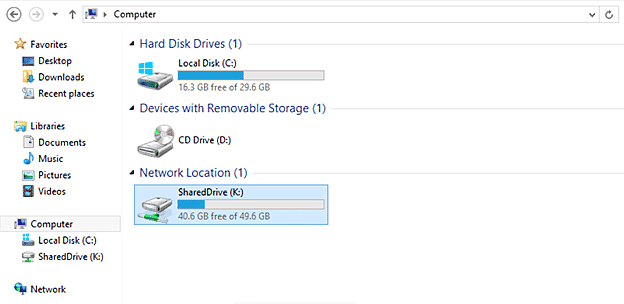
To check if the policy is applied, you can run gpupdate in command prompt, and as soon as the GPO is updated, you can find the mapped drive in File Explorer.

Mapping network drives with GPO for individual users
If you want to map network drive for individual users, you need to create a folder with your user’s logon name or sAMAccountName in the file server and then, follow the below steps:
- In Group Policy management console, create a GPO and link it to domain.
- Right-click on the newly created GPO > Edit.
- In the Group Policy management editor,
- Click User configuration > preferences > windows settings.
- Right-click on Drive maps > New > Mapped drives.
- In the new drive properties, choose an action ( e.g., Update) and enter a file server path with %UserName%, as the user’s logon name. Fill in the other fields, then click Apply and Ok.
Observations and tips
Once Group Policy is applied, the mapped drive will show up almost immediately. If it does not appear, you need to do either of the following:
- Ensure the policy is promptly applied to the appropriate user account. You can do that by running “gpupdate/r” on the command prompt.
- Ensure the given drive letter is not already used. The drive actions depend on the letter assigned, wherein, if the letter is already being used, the create, and update actions cannot be performed, and actions such as delete and replace could be used.
Final thoughts
We have learned how to map network drives using GPO and found it to be one of the easiest and simplest methods of mapping, unlike the regular logon scripts which require scripting knowledge and experience. Also, the item-level targeting is helpful for focusing on individual users, enabling you to manage them efficiently.