

Active Directory Users and Computers (ADUC) is a common tool used by administrators to carry out daily tasks and much more in Active Directory AD. Some of the tasks an administrator can perform with the help of this MMC snap-in are as follows:
- Create and manage AD objects, such as users, computers, groups, and contacts, along with their attributes.
- Create Organizational Units (OU), move users and computers in and around them, and delete OUs.
- Delegate permissions to users to manage Group Policy.
- Define advanced security and auditing in AD.
- Deal with FSMO roles such as RID master, PDC Emulator and Infrastructure master.
- Raise the domain functional level.
- Advanced feature settings that help to manage the LostAndFound container, NTDS Quotas, Program Data, and System information.
How to Install Active Directory Users and Computers
The process to install ADUC for Windows 10 1809 and above differs from the process for Windows 10 1803 and below. Here are the two processes for installing ADUC:
Installing Active Directory Users and Computers for Windows 1809 and higher
- Go to Start, select Settings, and then Apps.
- Click on Manage Optional Features.
- In the new window, click on Add feature.
- Select RSAT: Active Directory Domain Services and Lightweight Directory Tools, and then click Install.
The installation of Active Directory Domain Services and Lightweight Directory Tools will contain the ADUC console. To verify, go to Start. It will now have Windows Administrative Tools on the list.
Installing Active Directory Users and Computers for Windows 1803 and lower, and Windows 8
- Download Remote Server Administrator Tools for your version of Windows, and install it. You can download the tool from the Microsoft Download Center.
- Go to Start, and select Control Panel.
- Navigate to Programs > Programs and Features > Turn Windows features on or off.
- Scroll down and expand Remote Server Administration Tools, and then navigate to Role Administration Tools > AD DS and AD LDS Tools.
- Check AD DS Tools, and then click OK.
When the installation process is done, you will have ADUC on your computer. To verify, go to Start. The menu will have a folder called Administrative Tools which should contain Active Directory Users and Computers.
How to open Active Directory Users and Computers
The following are some ways to open Active Directory Users and Computers on a DC:
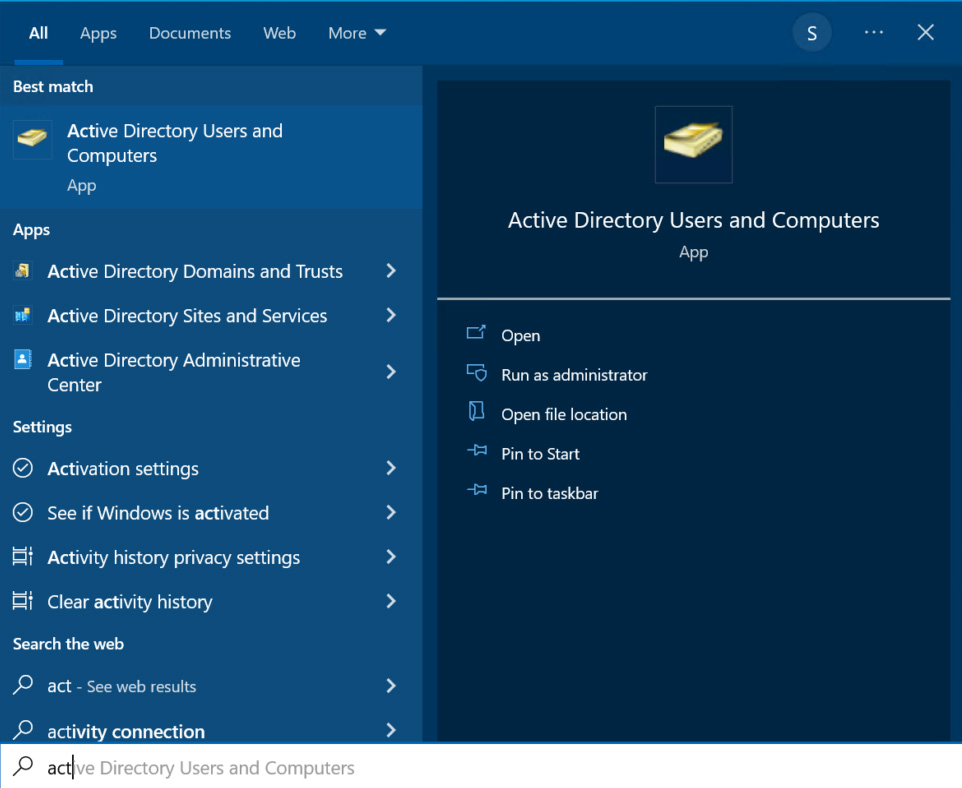
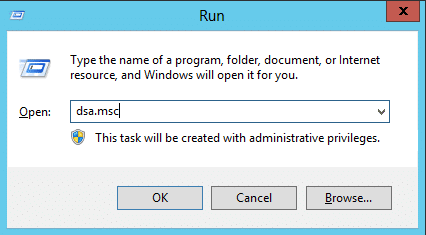
Method 1: Through RUN command
- Go to Start, and click Run.
- Type dsa.msc, and hit Enter.

Method 2: From the Start menu
- Go to Start → Administrative Tools → Active Directory Users and Computers.
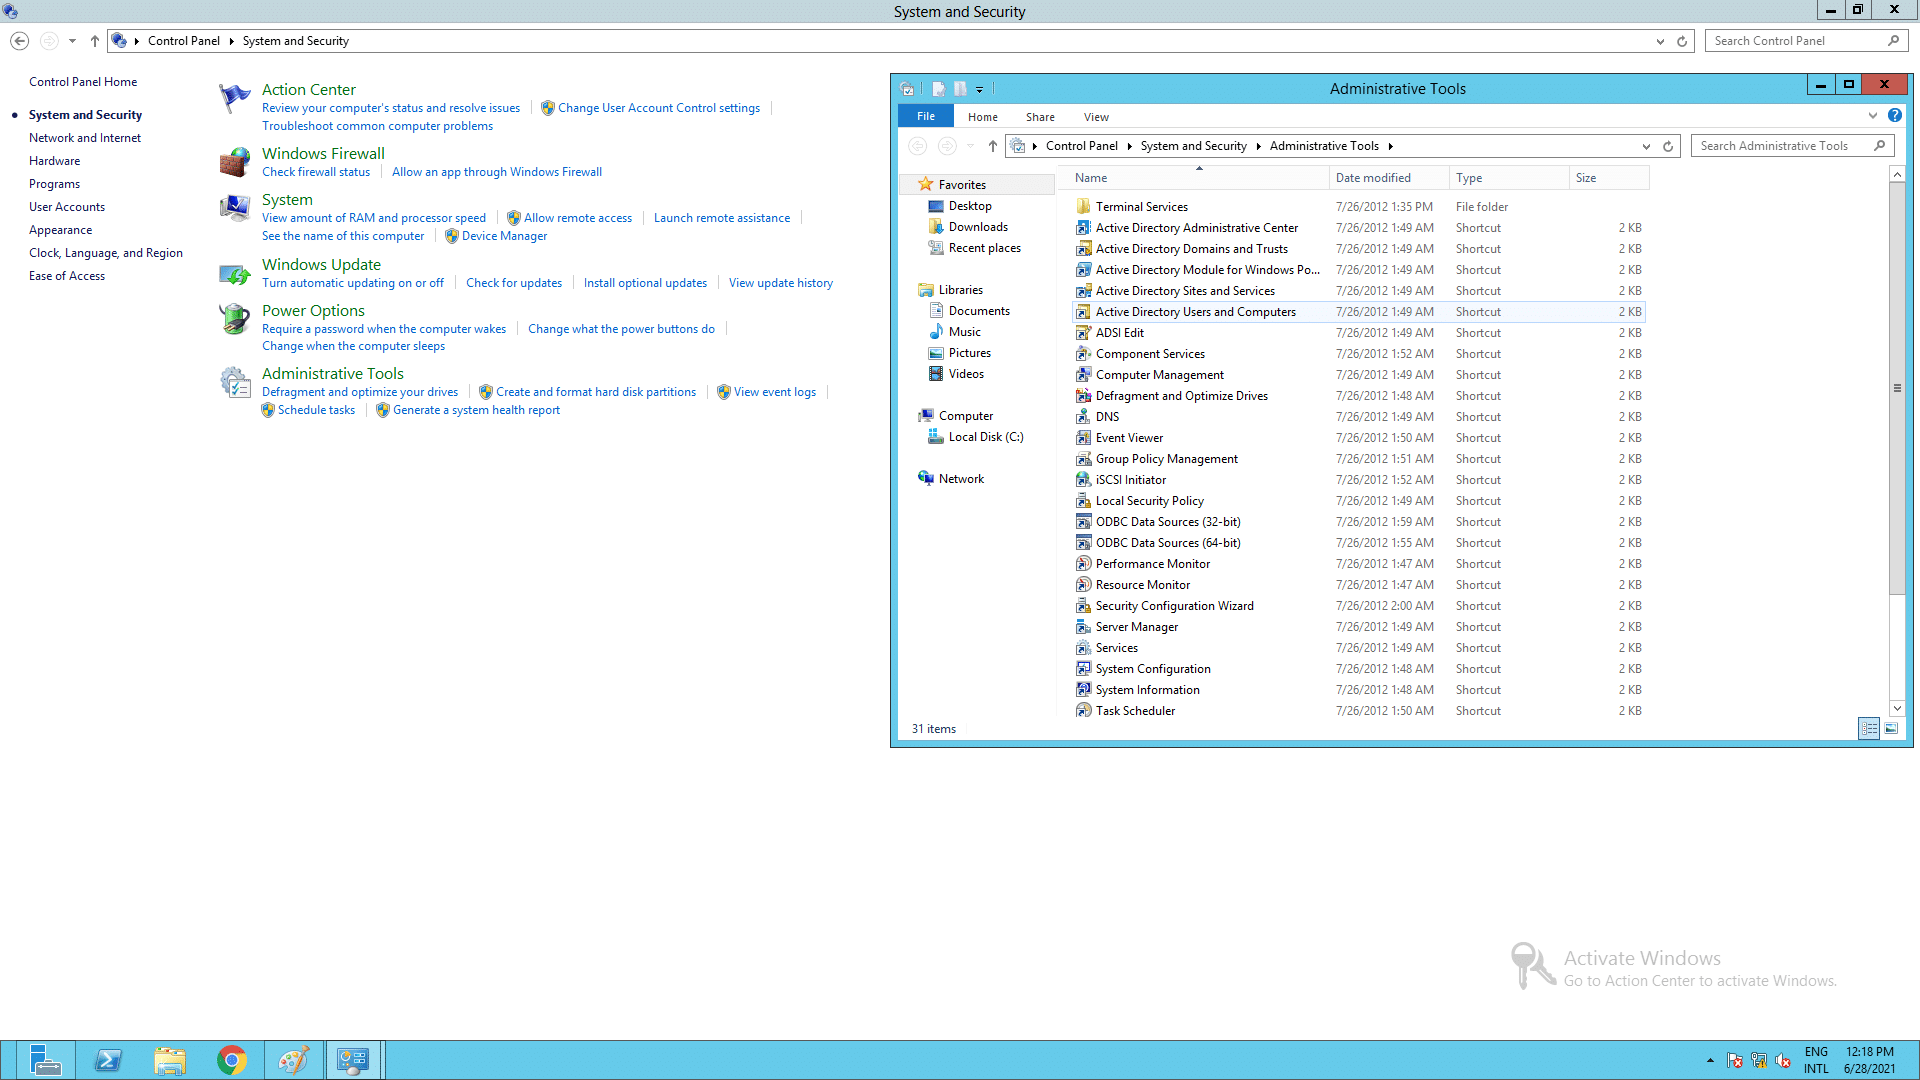
Method 3: From the Control Panel
- Go to Start → Control Panel.
- Click System and Security and select Administrative Tools.
- From the list of available tools, select Active Directory Users and Computers.

Now that ADUC has been installed and opened, let’s see how you can perform the various functions using the console.
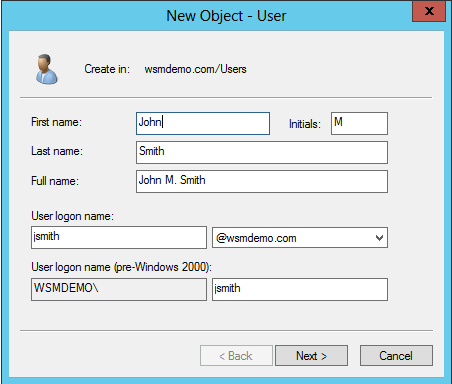
Creating a new user account
- In the left pane of ADUC, right-click on the folder where the user account is to be created.
- Click New and then click User.
- Type in the details such as First name, User logon name, etc., and click Next.
- Enter the user’s password and confirm it in the appropriate fields. Check the required password options.

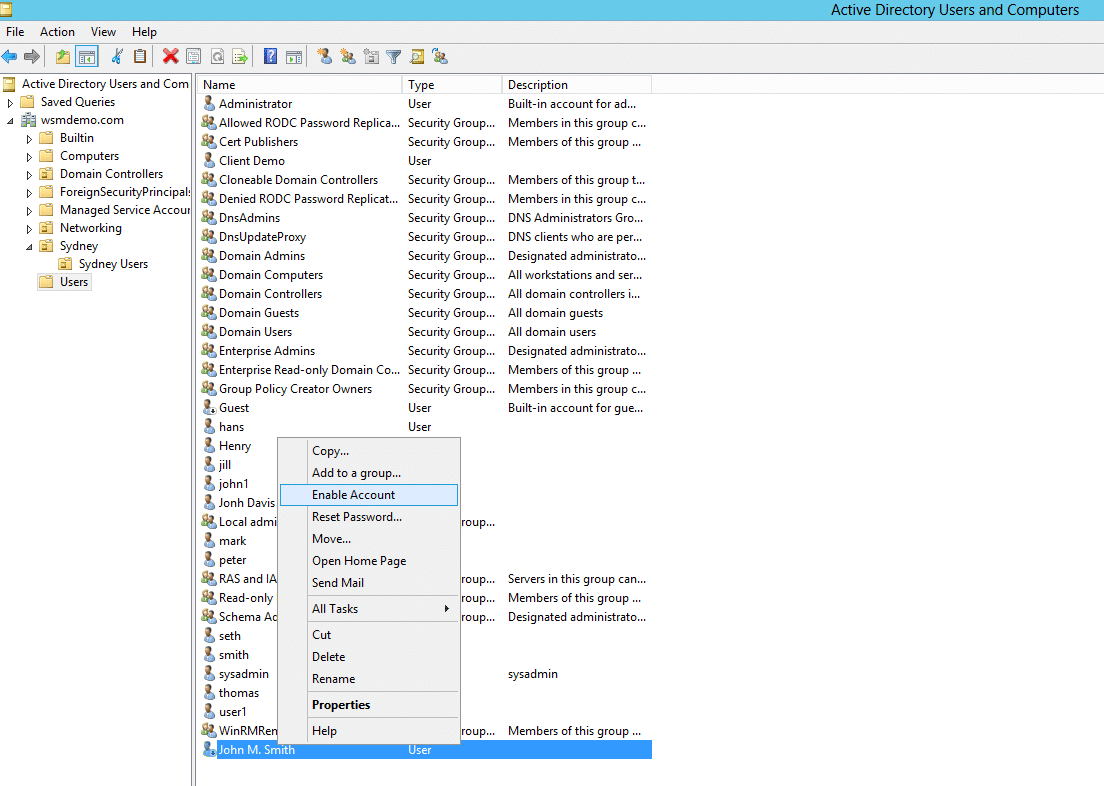
Enabling or disabling a user account
- In the left pane of ADUC, expand the folder containing the user account to be enabled/disabled.
- Right-click the user account and click Enable or Disable to enable or disable the user account as necessary.

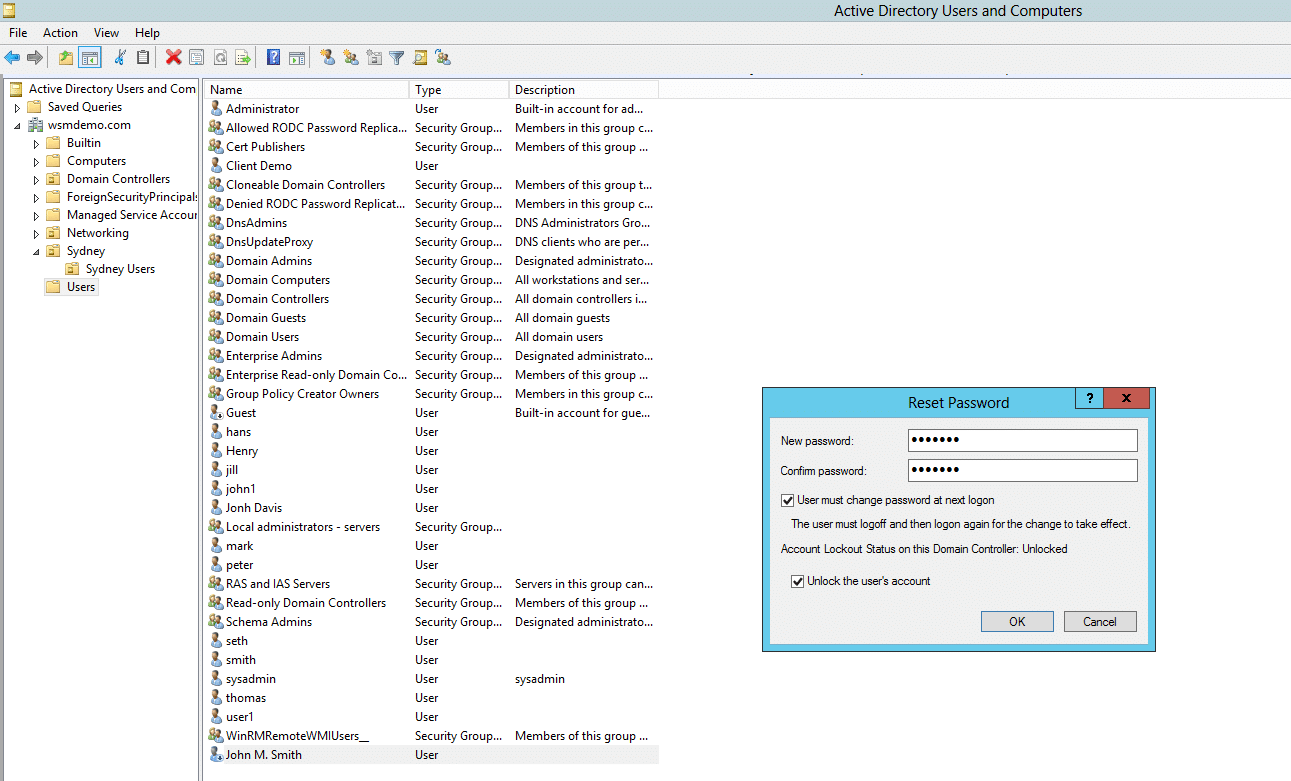
Resetting a user account password
- In the left pane of ADUC, expand the folder containing the user account whose password is to be reset.
- Right-click on the account, and select Reset Password.
- Type and confirm the password in the appropriate fields. Select other password-related options if needed.

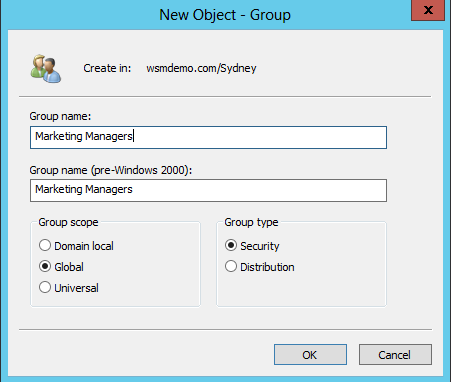
Creating a new group account
- In the left pane of ADUC, right-click the folder where the group account is to be created.
- Click New, and then click Group.
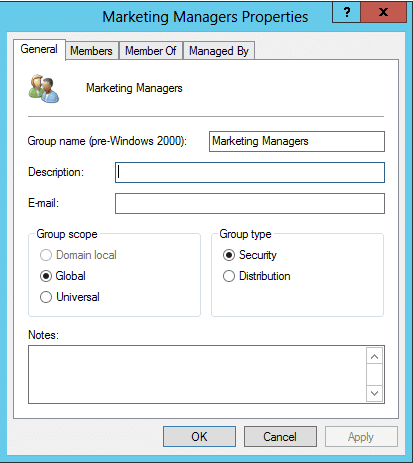
- Type in a suitable name for the group. For group scope, select one among domain local, global, and universal. For group type, select either security or distribution.
- Click Apply, and then click OK.

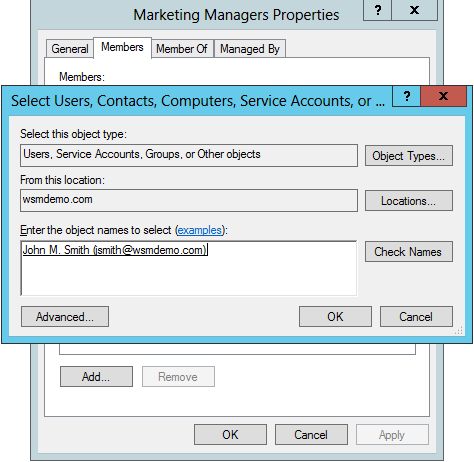
Adding a member to a group
- In the left pane of ADUC, right-click the folder containing the group account to which you want to add a member.
- Right-click on the group and select Properties.
- Click the Members tab, and then click Add.
- Type in the name of the objects you want to add to the group.
- Click OK.

Changing the group type or group scope
- In the left pane of ADUC, right-click the folder containing the group whose type or scope is to be modified.
- Right-click on the group and click Properties.
- Select the required scope or type for the group.
- Click Apply, and then click OK.

Creating a new computer account
- In the left pane of ADUC, right-click the folder where the computer account is to be created.
- Click New, and then click Computer.
- Type in a suitable name for the computer.
Resetting a computer account
- In the left pane of ADUC, right click the folder where the computer account is to be created.
- Click New, and then click Computer.
- Type in a suitable name for the computer.
Creating a new organizational unit (OU)
- In the left pane of ADUC, right click the domain name.
- Click New, and then click Organizational Unit.
- Type in a suitable name for the OU.
Deleting a users, computers, and OUs
- In the left pane of ADUC, right click the folder where the object is located.
- Right-click on the object, and select Delete.
Now, let us look at some advanced tasks that will come in handy for an administrator managing users, computers, and other objects in Active Directory.
Advanced Settings in ADUC
ADUC contains multiple advanced functionalities that allow administrators to work with complex settings and containers that are otherwise not visible in the console.
To enable advanced features, you can perform the following steps:
- Go to Start -> Administrative Tools, and click on Active Directory Users and Computers. The ADUC console will open.
- In the ADUC console, click View and Enable Advanced Features.
The advanced settings are now enabled. Now, to view the user and computer attributes, you can perform the following steps:
- In the left pane of ADUC, right click on the object whose attributes you want to see.
- Click on Properties, and then click the Attribute Editor tab. A list all the attributes pertaining to the object can be viewed.
Protecting Objects from Accidental Deletion
This action denies the permission to delete the object, and when attempting to do so it displays an error message.
The following steps illustrate how to protect AD objects from accidental deletion:
- Go to Start -> Administrative Tools, and click on Active Directory Users and Computers. The ADUC console will open.
- In the left pane of ADUC, right click on the object that is to be protected from accidental deletion, and click on Properties.
- Select the Object tab, and check the Protect object from accidental deletion option.
Searching for Objects
Objects in AD can be located using the Find dialog box in the ADUC console. The following steps illustrate how to perform the search:
- Go to Start -> Administrative Tools, and click on Active Directory Users and Computers. The ADUC console will open.
- In the left pane of ADUC, right click on the container object where the search is to be made.
- Select Find from the shortcut menu.
- In the Find Users, Contacts, and Groups dialog box that appears, specify the object type that is to be searched, and also the container where the search is to be carried out.
- To streamline the search, click on the Advanced tab.
- In the dialog box that appears, select the attribute search in the field list box. To refine the search further, use the conditions drop-down list. Specify a value for the conditional search in the value box. You may use the add button to include more conditions.
- Click Find Now to display the search results.
An alternate method to search for objects is using the DSquery command line tool. To learn how, you can check out this article.
Creating a Saved Query
Saved Queries in ADUC allows administrators to access and audit information in AD and filter just those objects that meet a certain criteria.
The following steps illustrate how you can create a Saved Query:
- Go to Start -> Administrative Tools, and click on Active Directory Users and Computers. The ADUC console will open.
- In the left pane of ADUC, right click Saved Queries and click New followed by Query.
- Type in a suitable name for the saved query and click Define Query.
- Select the required object tab and define the variables of your query.
- Click OK to save the query.
This will list only those accounts that fulfil the criteria specified in the query.
If you like to know more about Advanced features in Active Directory Users and Computers, check this article out.