What you will learn:
GPO security filtering vs WMI filtering – where to apply what? Fret not, let’s take a step back. Group Policies can be assigned at the OU, site, or domain level. However, there might be occasions where you might not want to apply the group policies for a select few computers or users. This is where security filtering and Windows Management Instrumentation (WMI) filtering come in handy. Security filtering and WMI filtering are Active Directory (AD) functionalities that pertain to group policy object (GPO) implementation. At the core, these two are filters that you can use to fine-tune the application of GPO to selected users or computers. In this article, you will learn what is security filtering and WMI filtering, and how you can apply these filters to only selected users and computers based on their properties. You will also learn the difference between a security filter and a WMI filter.
Default Group policy settings
By default, when you assign a GPO to a particular domain or an OU, the group policies are applied to all the authenticated users within that particular domain or OU. To exclude certain users or computers, or to apply filters only to a select few, you can filter the group policies in two ways:
- Security filtering
- WMI filtering
What is a security filter?
A security filter is an AD functionality that allows you to specify the users or computers to which you want a particular GPO to be applied. GPO Security filtering negates the frustration of dealing with authenticated users having excessive or insufficient security policies on them. You can use security filtering for a GPO through the Group Policy Management Console (GPMC) snap-in.
How to apply a security filter
You can open the GPMC console with the following steps:
- Go to Start and click Administrative Tools.
- Then, click on Group Policy Management.
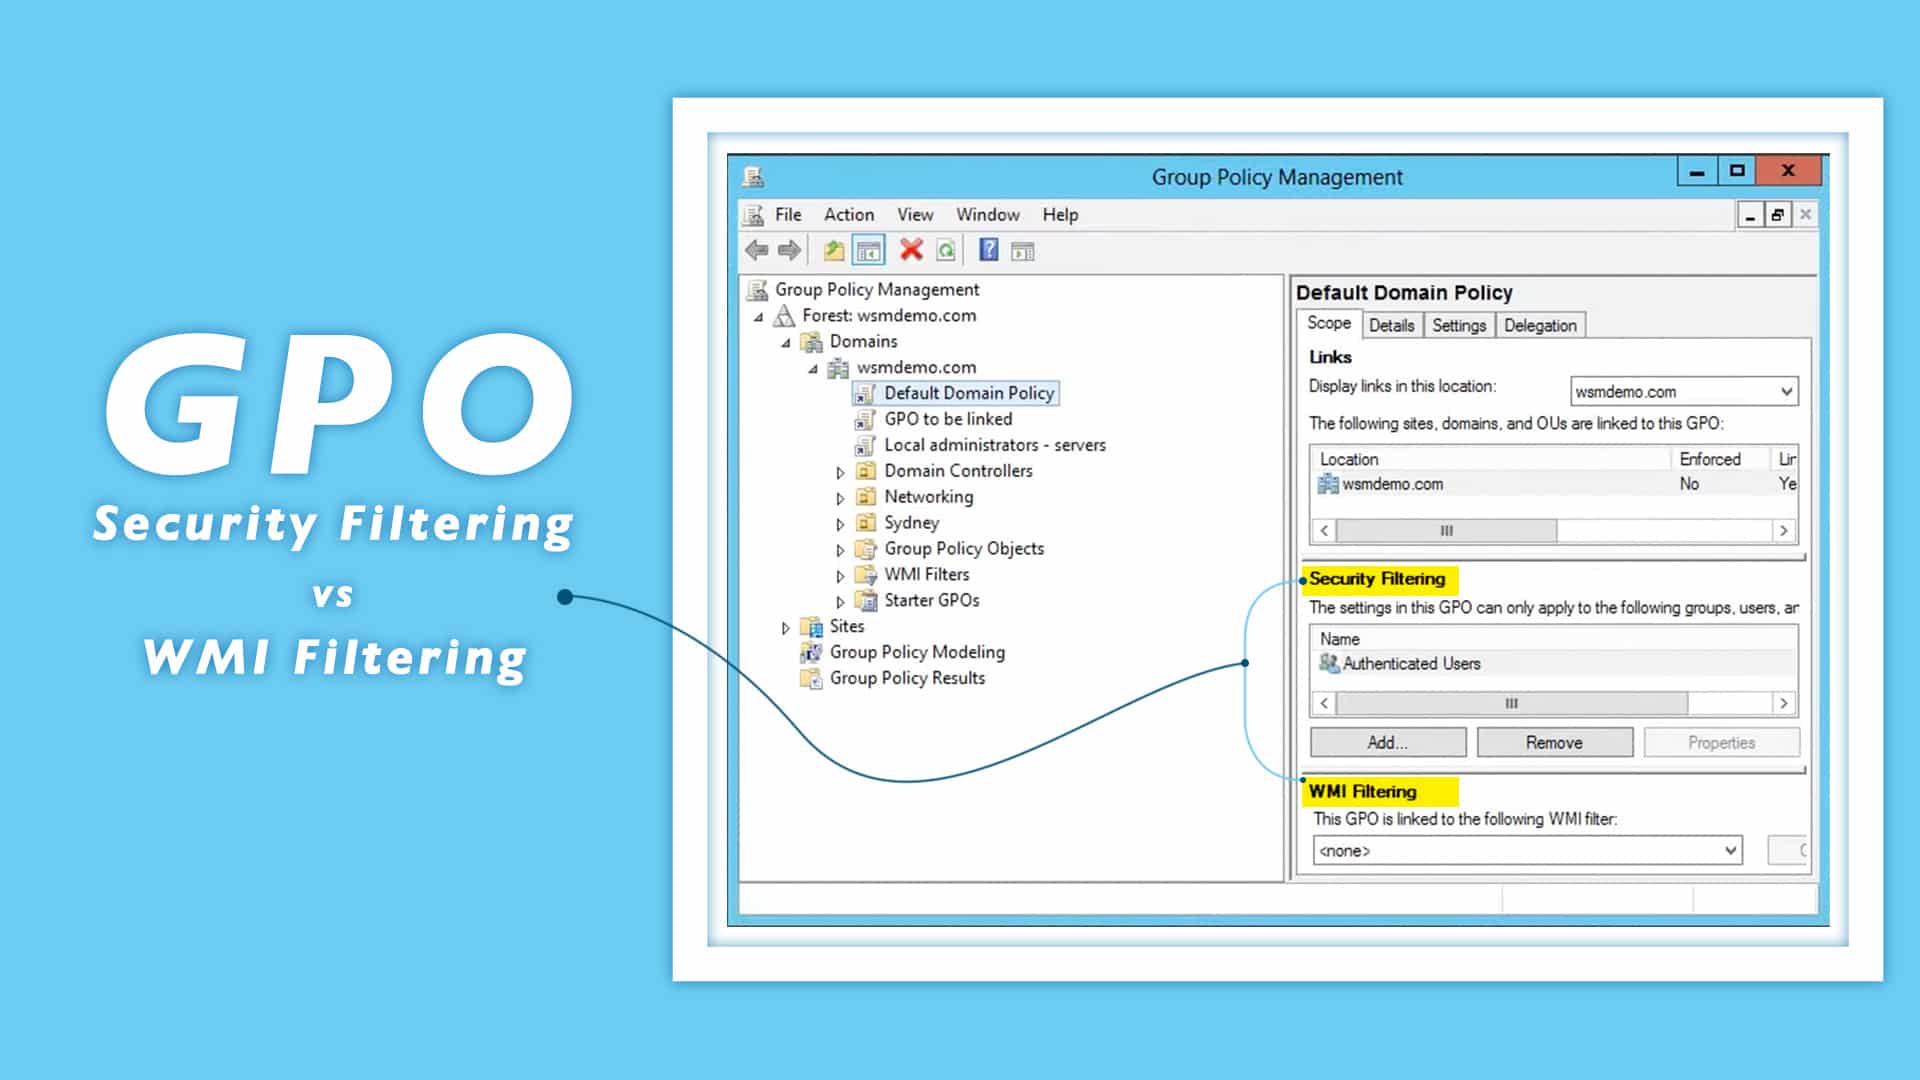
Once you have opened the GPMC console, navigate to the container with the GPO whose target objects you wish to modify, and click the GPO of preference. On the right side, you will be able to view the Scope tab, and at the bottom of the tab, you will see the Security Filtering section.
By default, the security filter would contain Authenticated users. This means that the selected GPO would be applied to all users and computers. If you do not want the policy to be applied to all the users and computers, you can select the Authenticated users entry and click Remove. Then, click Add to add only the users or computers you want.
Note: Whenever you add an object in the security filter section, the object will be added under the Delegation section as well. You can view the section under the Delegation tab. Any object when added to the security filtering section, and as a result, the delegation section, will have the following permissions:
- Read
- Apply group policy
One important point to note is that this process of security filtering was possible only until 2016 when Microsoft released a security patch named MS16-072. Post this security patch, the authenticated user’s necessarily require at least the read permission under the delegation tab. However, you can still conduct this process of security filtering. The only change would be that instead of removing the Authenticated user’s entry from the security filters section, you will have to revoke its ‘Apply group policy’ permission from the delegation tab. This will stop the group policies from being applied to all users and computers within the selected container.
What is WMI?
Windows Management Instrumentation (WMI), a part of Windows operating system, is a powerful toolkit developed by Microsoft as a subset of PowerShell. Windows Instrument Management (WMI) Provider Host — or WmiPrvSE.exe — is a key component for effective function of your computer’s various applications and systems. WMI gives IT administrators capabilities such as system-wide monitoring, and also the capability to administer the security settings of devices, provided they have the right permissions assigned to themselves. Being a subsystem of PowerShell, WMI uses commands for search, monitoring, and security administration. WMI filtering uses this powerful capability to apply GPOs to selected computers.
What is a WMI filter?
As mentioned, WMI filtering allows administrators to target specific computers based on filters that are provided to them, and then apply GPOs to the targeted computers. Adding a WMI filter to GPO reduces the hassle of searching for computes, organizing them under separate containers, and then creating separate group policies for them.
How to apply a WMI filter?
You can view WMI filters and apply new ones, in a similar way to security filters, using the GPMC console with the following steps:
- Go to Start and then click Administrative Tools.
- Now, click on Group Policy Management.
- Navigate to the WMI filters container
To create a new WMI filter for a GPO, right-click on the container, and select New. This will open a window where you can enter the name and description for the filter. Then, you can add queries into the filter. The queries do the heavy-lifting of filtering out the necessary computers. Click on Add to enter a new query.
Here’s a WMI filter example:
Let’s say that you want to filter out computers that run on Windows 10 operating system. Here’s how the WMI filter syntax will be:
“Select * from Win32_OperatingSystem where Caption = “Microsoft Windows XP Professional”Once you enter the required queries, click Save. This completes the filtering process. Now, you will have to link the GPO for which this filter functions. To do that, you can perform the following steps:
- Go back to the GPMC console, and select the GPO you want the WMI filter to attach itself to.
- Click on the GPO. On the right pane, you will be able to view the Scope tab, which will contain the WMI filters section under the security filters section.
- Choose the WMI filter form the drop-down box that you want to attach with this GPO.
- A confirmation box will pop up. Click Yes.
Now, you have successfully created a WMI filter and attached it to a GPO of your choice.
Difference between security filtering and WMI filtering
The purpose of both the filters is the same: to apply the GPOs only to select authenticated users. However, the key difference is that while security filtering allows you to filter out users and computers, WMI filtering only allows you to filter out computer objects based on the properties you use while entering the WMI query.
People also read